Employee
The first page of the Transaction Menu is the Employee Page, which functions to display data of all employees and allows adding or editing employee data.
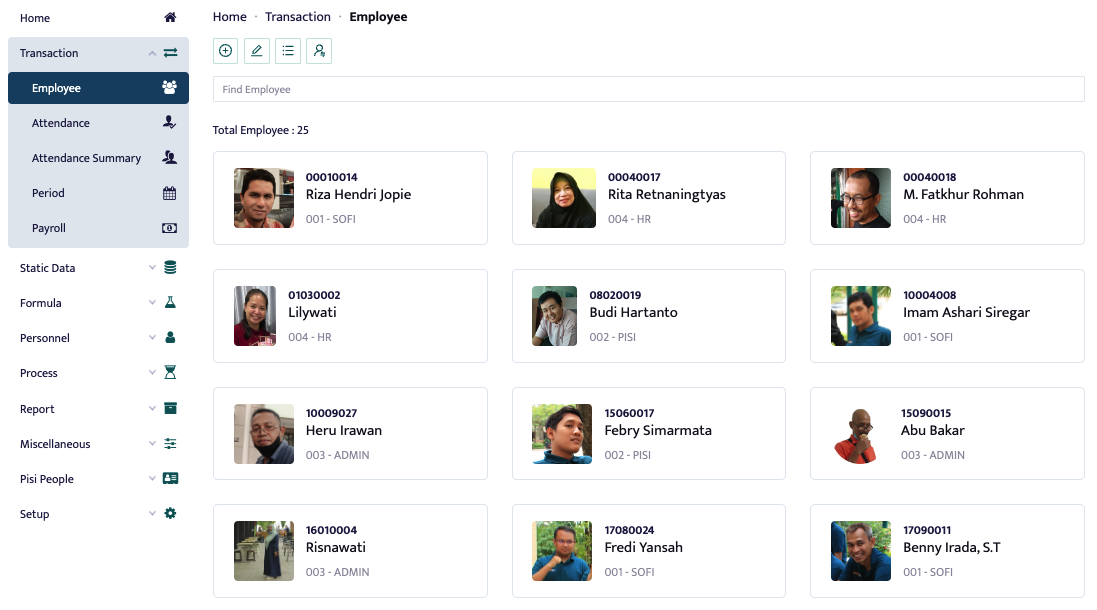
After the page above appears, the user can view all employee data. Then, the user can add, edit, and rejoin employee data in the top left corner of the page, as shown in the image below.

On the Employee Page, there is an employee data feature, displayed as in the image below.
General
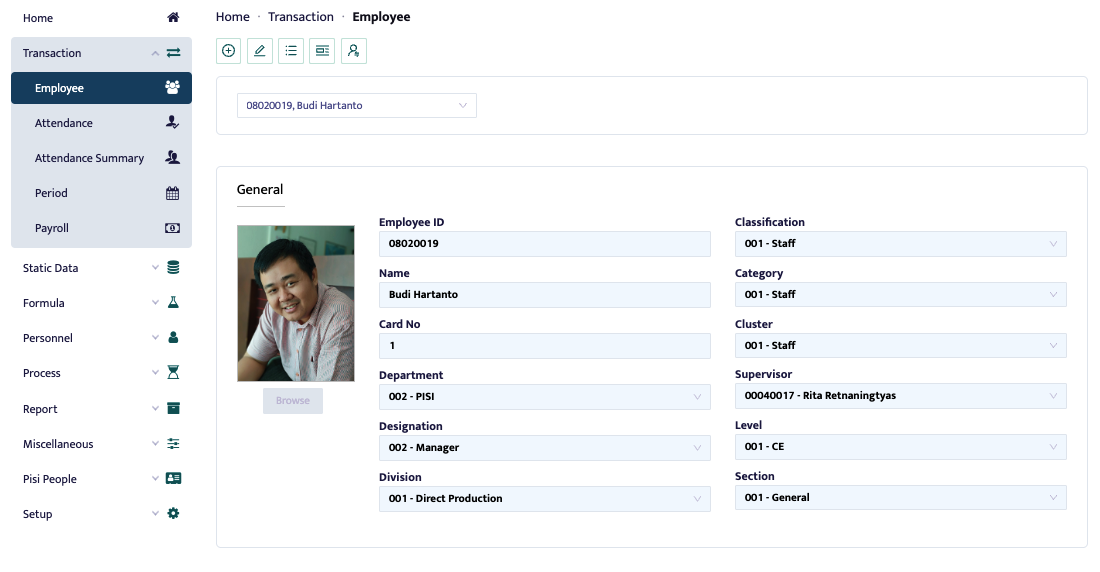
After the page above appears, the user can enter employee data such as name, badge number, and department. The steps needed to enter employee data are as follows:
- In the Employee ID field, enter the Employee ID.
- In the Name field, enter the employee's name.
- The Card No field is used to fill in the proximity card number if the company uses Proximity Card for data slotting.
- In the Department field, select the employee's department.
- In the Designation field, select the employee's position.
- In the Division field, select the employee's division.
- In the Classification field, select the employee's classification.
- In the Category field, select the employee's category.
- In the Cluster field, select the employee's cluster.
- In the Supervisor field, select the employee's supervisor.
- In the Level field, select the employee's level.
- In the Section field, select the employee's section.
Employment
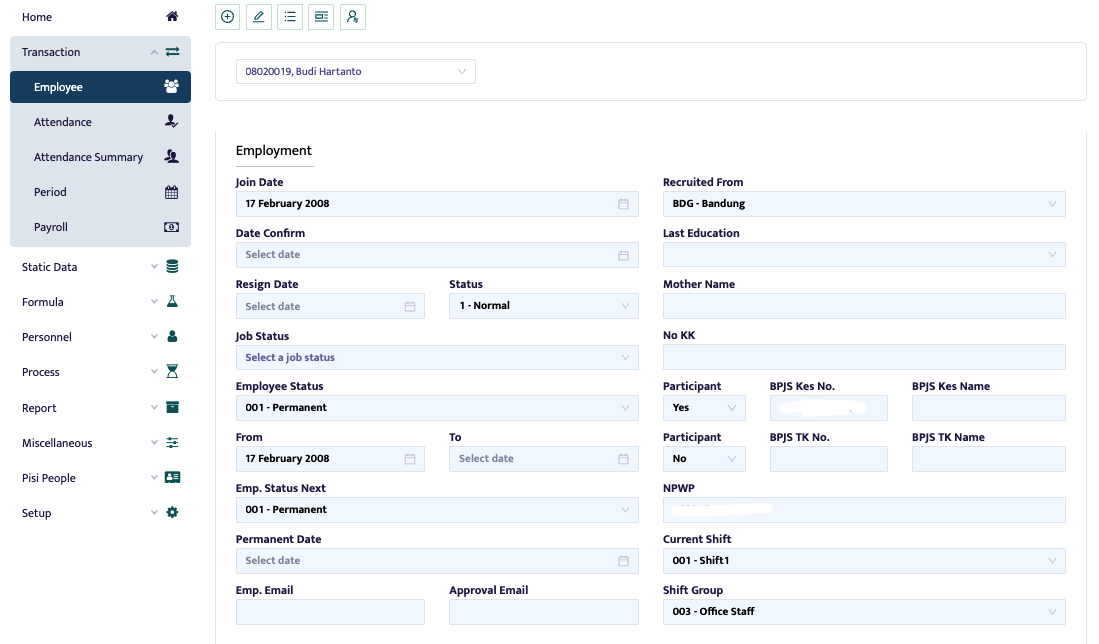
Employment is used for filling out data such as the employee's join date, resignation date, employment status, and NPWP as shown above. The steps needed to enter employee data are as follows:
- In the Join Date field, enter the employee's start date.
- In the Date Confirm field, enter the employee's confirmed start date.
- In the Resign Date field, enter the resignation date if the employee has resigned, so the data will no longer appear in attendance processing.
- In the Status field, select the employee's status.
- In the Job Status field, select the employee's job status.
- In the Employee Status field, select the employee's employment status.
- In the From field, enter the start date of the employee's contract.
- In the To field, enter the end date of the employee's contract.
- In the Emp.Status Next field, select the employee's next status, whether permanent or contract.
- In the Permanent Date field, enter the employee's permanent employment start date.
- In the Emp.Email field, enter the employee's email address.
- In the Approval Email field, enter the approval email address.
- In the Recruited From field, select where the employee was recruited from.
- In the Last Education field, enter the employee's last education.
- In the Mother Name field, enter the employee's mother's name.
- In the No KK field, enter the employee's family card number.
- In the Participant field, select Yes or No for participation in BPJS Health and BPJS TK.
- In the BPJS Kes No, BPJS Kes Name, BPJS TK No, BPJS TK Name fields, enter the BPJS Health and BPJS TK numbers and names of the employee.
- In the NPWP field, enter the employee's tax ID number.
- In the Current Shift field, select the employee's current shift.
- In the Shift Group field, select the employee's shift group.
Personal Information
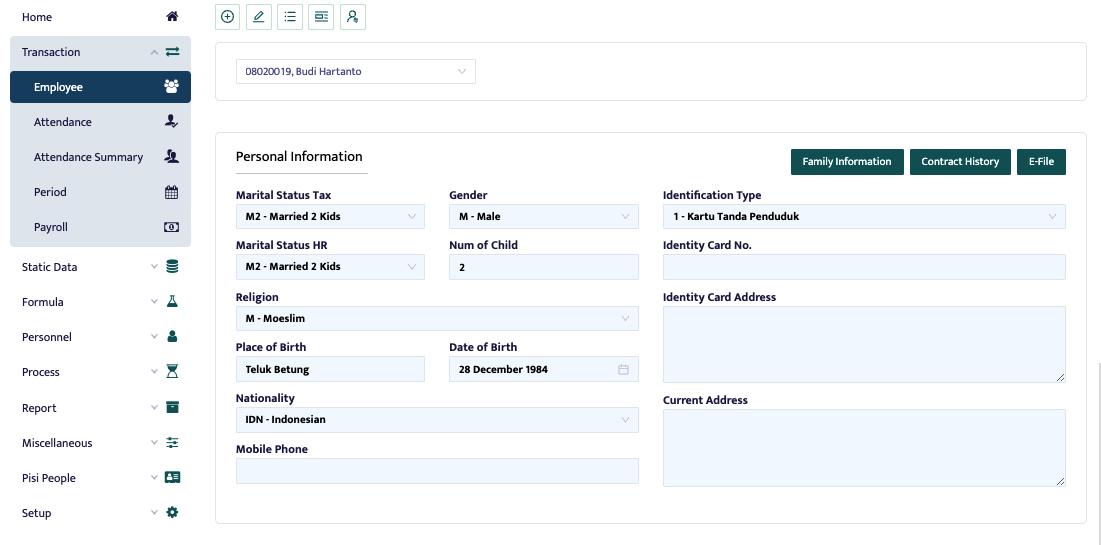
Personal Information is used to fill in the employee's personal data, such as marital status, religion, phone number, and address, as shown above. The steps needed to enter employee data are as follows:
- In the Marital Status Tax field, select the employee's tax marital status.
- In the Marital Status HR field, select the employee's HR marital status.
- In the Gender field, select the employee's gender.
- In the Num of Child field, enter the number of children.
- In the Religion field, select the employee's religion.
- In the Place of Birth field, enter the employee's place of birth.
- In the Date of Birth field, enter the employee's date of birth.
- In the Nationality field, select the employee's nationality.
- In the Mobile Phone field, enter the employee's phone number.
- In the Identification Type field, select the type of identification.
- In the Identity Card No field, enter the employee's identity card number.
- In the Identity Card Address field, enter the address on the employee's identity card.
- In the Current Address field, enter the employee's current address.
On the Employee Page, there is also a rejoin feature, as shown in the image below.
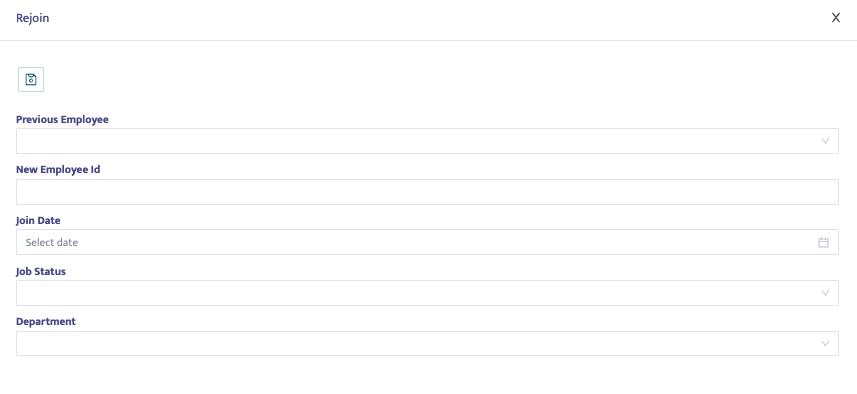
Rejoin is used for re-entering data of employees who have rejoined the company. The steps needed to rejoin an employee's data are as follows:
- In the Previous Employee field, select the previous employee.
- In the New Employee ID field, enter the new employee ID.
- In the Join Date field, enter the rejoin date.
- In the Job Status field, select the employee's job status.
- In the Department field, select the employee's department.