Deduction
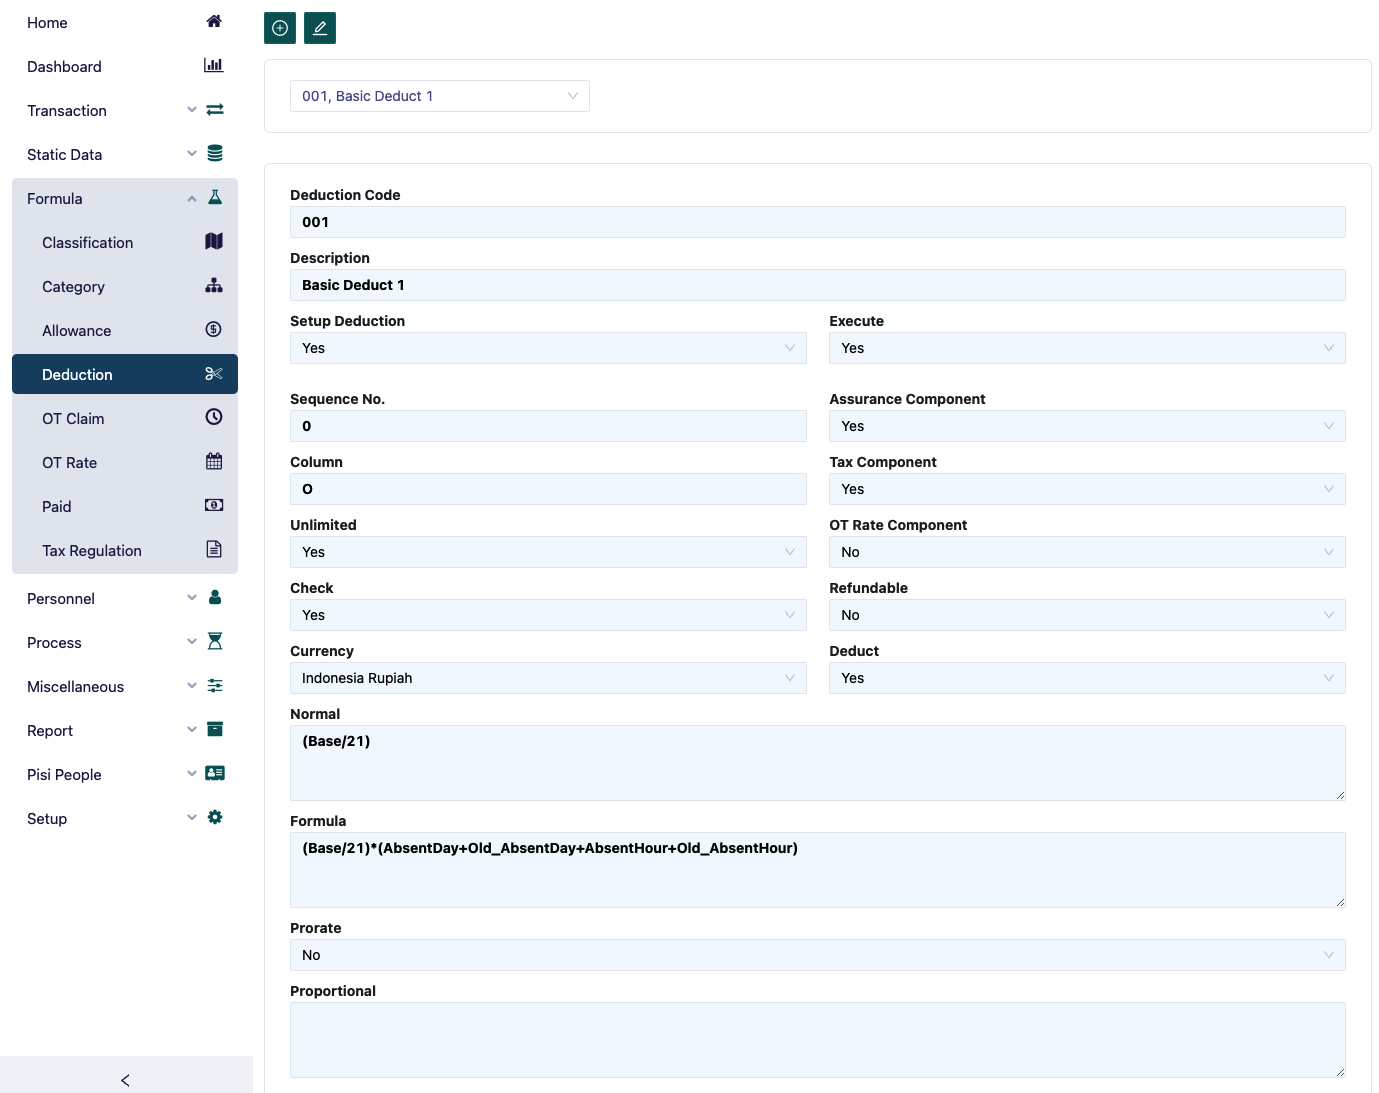
The deduction form is used to define all types of deductions applicable in a company. To add a new deduction, press the button in the top left corner.
To modify a deduction, press the button next to the "create new" button.
The steps required to enter a deduction are as follows:
- In the deduction code field, type the code for the deduction to be entered.
- In the description field, type the name of the deduction.
- In the Sequence No field, type the sequence number for the deduction. This will guide the system on which deduction will be processed first.
- In the column field, type the column for the deduction. This helps group deductions, for example, absence deductions divided into two: absent day and absent hour. If you want both to appear in the same column in the report, e.g., column Q, then type Q. The available deduction columns are from P to Z.
- In the Unlimited field, select ‘Yes’ if the deduction will be continuously applied to the employee. Example: Absence deductions are continuously applied if certain criteria are met, while select ‘No’ if the deduction is only for a certain period, like a loan deduction.
- In the Check field, select ‘Yes’ if the deduction details are correctly filled. If it's still 'No', payroll posting cannot proceed.
- In the Currency field, select the currency for the deduction payment.
- In the Normal field, type the value of the deduction, e.g., Base/173. This field can be used by the formula field.
- In the Formula field, type the deduction formula, e.g., AbsentDay*Normal for absence deductions.
- In the Prorate field, select ‘Yes’ if the deduction will be prorated.
- In the Prorate Formula field, type the formula for proration.
For more details about proration, refer to the allowance section.
- In the setup deduction field, select ‘Yes’ if the deduction applies to all or a group of employees with the same deduction amount. The deduction will appear in the Category menu under the deduction field. Select ‘No’ if the deduction amount varies between employees, and it will appear in the Employee menu under the deduction field.
- In the Execute field, select ‘Yes’ if the deduction is applicable, and select ‘No’ if it is no longer applicable.
- In the Assurance Component field, select ‘Yes’ if the deduction is used as a component for social security calculations, select ‘No’ if not.
- In the Tax Component field, select ‘Yes’ if the deduction is used as a component for tax calculations, select ‘No’ if not.
- In the Absent Component field, select ‘Yes’ if the deduction is used as a component for absence calculations, select ‘No’ if not.
- In the OT Rate Component field, select ‘Yes’ if the deduction is used as a component for overtime rate calculations, select ‘No’ if not.
- In the Deduct field, select ‘Yes’ if the deduction is applied during payroll, select ‘No’ if not.
- Refundable. Select ‘Yes’ if the deduction can be recorded in the employee form and processed further, for example, refunded. Select ‘No’ if not. Example: A uniform deduction can be refunded if the employee resigns.
The member column will automatically display the list of employees who receive this deduction after it is selected either in the Employee menu under Transaction Entry or in the Category menu. To view it, click the list member button.
The OT Rate form is used to define the overtime rate. The steps required to enter the OT Rate formula are as follows:
- The field filling method in the OT rate form is the same as in the Paid menu. Example of an OT rate formula based on government regulations: (Base + OT Allow) / 173. OT Allow is the overtime allowance, where the value is determined when entering data in the allowance menu, i.e., all types of allowances where the OT Rate Component field is set to ‘Yes’.
- In the Currency field, select the currency used for calculating the overtime rate.
- The member column will automatically display the list of employees after selecting the Paid type in the Category menu under the OT rate field. To view it, click the list member button.